參考資料: https://www.tecmint.com/set-display-screen-resolution-in-ubuntu/
使用 xrandr 新增自訂義解析度
在終端機使用 xrandr 查看目前有哪些解析度
1
2
3
4
5
6
7
8
9
10
11
12
13
14
15
16
17
18
19
20
21
22
23
24
25
26
27
28
29
30
31
$ xrandr
Screen 0: minimum 1 x 1, current 1280 x 960, maximum 8192 x 8192
Virtual1 connected primary 1280x960+0+0 (normal left inverted right x axis y axis) 0mm x 0mm
   800x600       60.00 +  60.32
   2560x1600     59.99
   1920x1440     60.00
   1856x1392     60.00
   1792x1344     60.00
   1920x1200     59.88
   1600x1200     60.00
   1680x1050     59.95
   1400x1050     59.98
   1280x1024     60.02
   1440x900      59.89
   1280x960      60.00*
   1360x768      60.02
   1280x800      59.81
   1152x864      75.00
   1280x768      59.87
   1024x768      60.00
   640x480       59.94
Virtual2 disconnected (normal left inverted right x axis y axis)
Virtual3 disconnected (normal left inverted right x axis y axis)
Virtual4 disconnected (normal left inverted right x axis y axis)
Virtual5 disconnected (normal left inverted right x axis y axis)
Virtual6 disconnected (normal left inverted right x axis y axis)
Virtual7 disconnected (normal left inverted right x axis y axis)
Virtual8 disconnected (normal left inverted right x axis y axis)
$ xrandr --listactivemonitors
Monitors: 1
 0: +*Virtual1 1280/339x960/254+0+0  Virtual1
可以發現我們目前的解析度為 1280x960 ,顯示器叫做 Virtual1
接著使用 cvt (calculate VESA) 來幫我們計算自訂義解析度所需要的參數。例如我的螢幕解析度為 1920x1080 ,扣掉 Windows 工具列和 VirtualBox 視窗所佔的空間後,我需要自定義一個 1920x960 的解析度,指令如下:
1
2
3
$ cvt 1920 960
# 1920x960 59.99 Hz (CVT) hsync: 59.75 kHz; pclk: 152.00 MHz
Modeline "1920x960_60.00"  152.00  1920 2032 2232 2544  960 963 973 996 -hsync +vsync
將 Modeline 後面的字串餵給 xrandr,接著再次查看目前有哪些解析度
1
2
3
4
5
6
7
8
9
10
11
12
13
14
15
16
17
18
19
20
21
22
23
24
25
26
27
28
29
30
31
32
$ xrandr --newmode "1920x960_60.00"  152.00  1920 2032 2232 2544  960 963 973 996 -hsync +vsync
$ xrandr
Screen 0: minimum 1 x 1, current 1280 x 960, maximum 8192 x 8192
Virtual1 connected primary 1280x960+0+0 (normal left inverted right x axis y axis) 0mm x 0mm
   800x600       60.00 +  60.32
   2560x1600     59.99
   1920x1440     60.00
   1856x1392     60.00
   1792x1344     60.00
   1920x1200     59.88
   1600x1200     60.00
   1680x1050     59.95
   1400x1050     59.98
   1280x1024     60.02
   1440x900      59.89
   1280x960      60.00*
   1360x768      60.02
   1280x800      59.81
   1152x864      75.00
   1280x768      59.87
   1024x768      60.00
   640x480       59.94
Virtual2 disconnected (normal left inverted right x axis y axis)
Virtual3 disconnected (normal left inverted right x axis y axis)
Virtual4 disconnected (normal left inverted right x axis y axis)
Virtual5 disconnected (normal left inverted right x axis y axis)
Virtual6 disconnected (normal left inverted right x axis y axis)
Virtual7 disconnected (normal left inverted right x axis y axis)
Virtual8 disconnected (normal left inverted right x axis y axis)
  1920x960_60.00 (0x3c2) 152.000MHz -HSync +VSync
        h: width  1920 start 2032 end 2232 total 2544 skew    0 clock  59.75KHz
        v: height  960 start  963 end  973 total  996           clock  59.99Hz
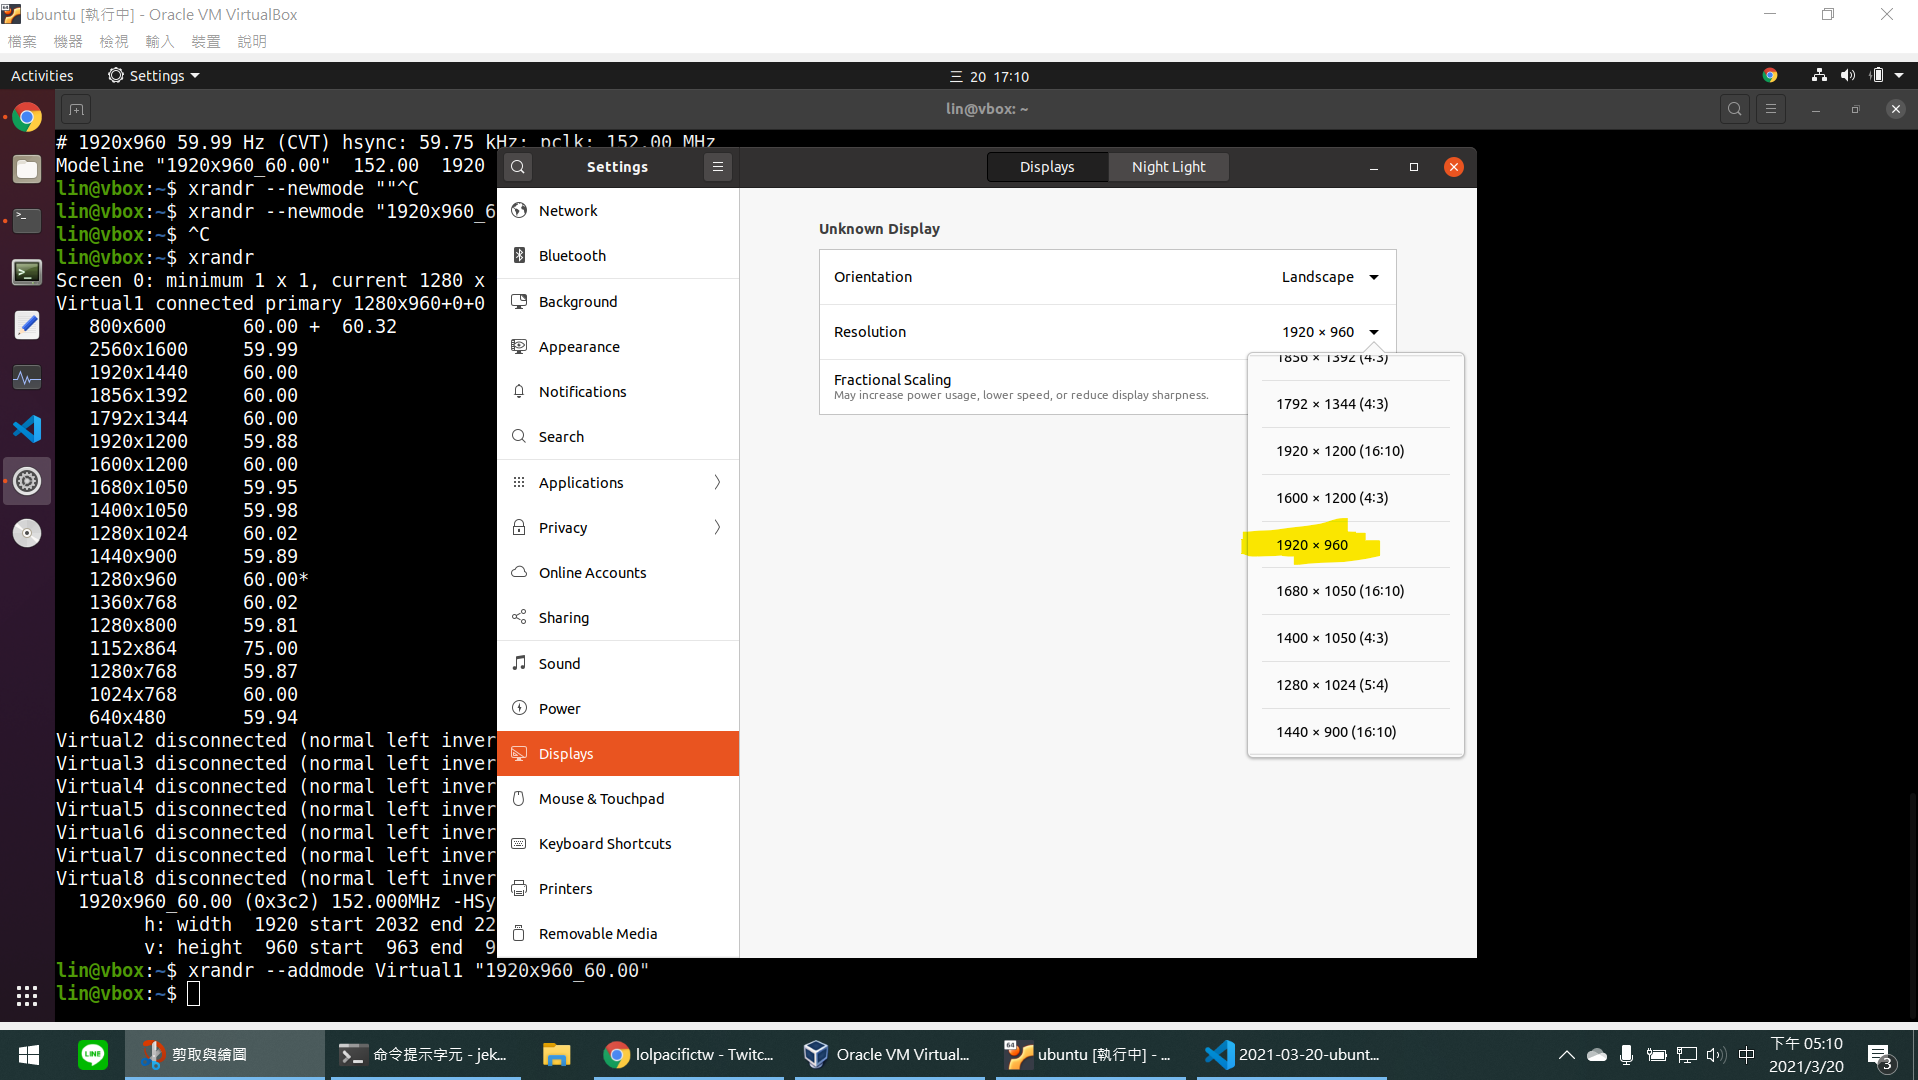
可以發現多了一個 1920x960_60.00 的顯示設定,將其加入 Virtual1 的顯示設定:
1
$ xrandr --addmode Virtual1 "1920x960_60.00"
此時解析度會重整為 640x480 ,請勿緊張。這時開啟Settings->Displays->Resolution 應該就可以切換到自定義的解析度
這個方法只能 fit 當前的視窗大小,如果需要常常縮放 VirtualBox 視窗,則會在邊邊出現 scroll bar

只做完以上設定,如果重新開機會遺失客製化的解析度,如果要永久保存,在 /etc/X11 創建一個檔案叫 xorg.conf ,新增以下內容
1
2
3
4
5
$ cat /etc/X11/xorg.conf
Section "Monitor"
    Identifier "Virtual1"
    Modeline   "1920x960_60.00"  152.00  1920 2032 2232 2544  960 963 973 996 -hsync +vsync
EndSection